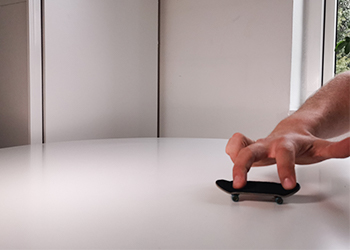
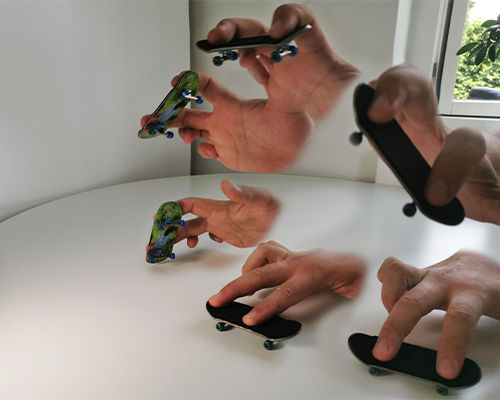
One of the most essential tricks to learn when fingerboarding is the Ollie. A trick done by applying pressure on the tail with the back finger for a solid pop, followed up with an upwards flick with the wrist moving front finger towards the nose for leveling out the board in the air. While declining in the air, pressure is applied evenly with both fingers for an even landing.

1. Finger Placement: Place your index-finger between the middle and nose of the board while keeping your middle-finger on the tail for pop.

2. Popping the Tail: Apply pressure on the tail with your back finger for a solid pop, making the board go in a vertical position.

3. Flicking front-finger and wrist up- and forwards: As the board is in the vertical position after popping, moving the index-finger upwards towards the nose will make the board elevate for air. Instead of focusing on moving the index-finger alone, a great tip is to focus on the movement of the entire hand and wrist for the board to air.

4. Leveling out the board in the air: To level out the board turn your wrist horizontal again while letting your middle-finger control the tail of the board.

5. Landing: Apply an even pressure with both fingers while the board declines in the air for an even landing

Learning the Ollie on a fingerboard can take time and requires patience, it is all about timing those five steps above correctly and building “muscle memory” for it – after enough practice you will be able to Ollie on a fingerboard with your eyes closed!
Tips for practicing the movement of the Ollie
Using arm, leg or edge of the table
To practice and get a feel for the overall movement of the Ollie, try using the edge of a table, your arm or leg. The point here is that you can pop excessively backwards, letting the board rest upside-down in a horizontal position, so you bring the board upwards for air easier.

Rollback
Another tip for getting more air when trying to Ollie in the beginning is to do a “rollback” as you pop for the Ollie. The reason why, is because rolling “backwards” (fakie) gives extra momentum for the pop and helps the board in that vertical position after the pop, making it easier to air.

Common challenges when learning The Ollie
Fingerboard not getting air when ollieing
It can be difficult to do Ollies just on a flat desk alone in the beginning. A great tip is to find some sort of obstacle to ollie up on or over. If you are just starting out, I would recommend finding something to ollie up on. Could be a book or small cardboard box for example, anything you can find around the house which will make a fine small “Ollie box”. As you progress, you can easily stack multiple books or boxes on top of each other to make your target height higher and higher. You can also practice Ollie over small objects such as another fingerboard, a pen or cables.
Board randomly flying out of bounds
Sometimes it can be difficult to control the board when trying to Ollie. A great tip here is trying not to pop as hard while flicking more forwards when moving the front finger and wrist upwards for air. The board can easily spin out of control while trying to Ollie if contact is lost with the board.
I hope these tips helped you on your journey to learning how to ollie on a fingerboard. Remember, it takes practice and patience to learn the ollie perfectly, but with time it will make it come eventually!
After learning the Ollie
Ollie into Manuals
Being able to Ollie the fingerboard up on obstacles opens for new possibilities. One of them is to start doing combos with manuals.
Ollie over gaps
You can create a drop, gap or small stair set out of books or boxes to Ollie. It can be helpful to start small and build your way up from there. Eventually with more control you can even start to ollie from the edge of the desk onto the floor, which might take some impact to control the board in the air.
Ollie into Grinds
You can also Ollie up on obstacles for locking into grinds. This can for example be the edge of a box, where the truck of the fingerboard grinds along.
Frontside and Backside 180 Ollie & Slides
Variations such as Frontside and Backside 180 Ollie can be learned, which is a combination of doing an Ollie, while rotating the hand 180 degrees with the board. This is especially helpful for doing slides on obstacles. The reason for this is that doing slides such as board- nose- and tailslide often require turning 90 degrees to be able to slide on the part of the board which makes contact with the obstacle. Press here for the full guide on how to Frontside 180 Ollie.
Wanna see more?
To see more guides on fingerboard tricks press here.
To visit the FingerFlicks shop section press here.
